⏰ Build Your Time, Build Your Skills!
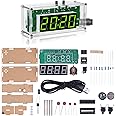
The MiOYOOWTJ-56-428 4-Digit Digital DIY Clock Kit is an engaging electronics project designed for students and DIY enthusiasts. This kit allows users to assemble a light-controlled temperature clock that displays time, date, and temperature, while also featuring customizable alarm tones. With clear instructions and a focus on practical skills, it's an excellent choice for educational settings and personal projects alike.


| Brand | MiOYOOW |
| Color | 4 Digit Multifunctional Clock Kit |
| Display Type | Digital |
| Style | 经典的 |
| Special Feature | Timer |
| Product Dimensions | 3"W x 0.9"H |
| Power Source | DC |
| Room Type | Home Office |
| Shape | Rectangular |
| Indoor/Outdoor Usage | Indoor |
| Material | Acrylic |
| Theme | Music |
| Frame Material | Acrylic |
| Are Batteries Included | No |
| Item Weight | 2.4 ounces |
| Alarm Clock | Yes |
| Watch Movement | Mechanical |
| Number of Items | 1 |
| Operation Mode | Automatic |
| Manufacturer | WHDTS |
| UPC | 761064429632 |
| Part Number | GY20029 |
| Item model number | GY20029 |
| Size | Medium |
| Item Package Quantity | 1 |
| Special Features | Timer |
| Included Components | electronic cpmponents |
| Batteries Included? | No |
| Batteries Required? | No |
C**T
The best electronics kit on Amazon - make this in ten minutes! LEARN ELECTRONICS - here is how!
This is a great kit to learn about electronics. Of all the kits available on Amazon this one is most likely the best for learning. It also ends up with a great clock. I have built three of them so that for my day job I can track my employees who are in different time zones.If you are looking for a way to learn about electronics, a way to learn about soldering, a great alarm clock that you can be proud to have built – THIS is the kit to purchase. It is the best one on Amazon. Look no further!I am using this in my university courses to get students exposed to circuit components and construction.Here is a portion of my lab assignment for this project that might help you build it.ToolsMake sure you have a• Soldering Iron• Solder• Small wire clippers• Optional – a silicon work mat (so you wont burn the surface you are working on)Here are ways to make your project NOT work.• Inserting certain components with the wrong polarity (in the wrong direction).• Cold solder joints.• Missing a solder connection.• Solder bridges (inadvertently connecting two solder pads on the back of the PCB).• Not inserting the power barrel connector all the way in.Layout the parts in the order that they will be installed.Build• Insert the two resistors and bend the leads to hold the resistors in place. They can be placed in any direction as resistors do not have polarity.• Install the two 30 pf ceramic capacitors and bend the leads to hold the capacitors in place. Make sure you put the right capacitors in the right locations.• Install the 104 pf ceramic capacitor and bend the leads to hold the capacitor in place. Make sure you put the right capacitor in the right location.• Install the 12 MHz crystal oscillator and bend the leads to hold the oscillator in place.• Solder all the leads to the PCB board. Remember to heat the board and the wire and not the solder. The solder will flow when the PCB connection and wire are hot enough. The connection should be shiny if a good solder connection has been made.• Clip all the leads.• Install the network resistor. The network resistor must be installed with the dot aligned with the mark on the PCB board.• Solder the network resistor’s nine pins.• Insert the DIP-20 IC socket. The DIP-20 IC socket must be installed with the notch aligned with the printed notch on the PCB.• Solder the 20 pins.• Insert the transistor. The transistor must be installed with the flat side of the transistor aligned with the flat side printed on the PCB. Bend the leads to hold the transistor in place.• Solder the three leads.• Clip the three leads.• Insert the two button switches. If they aren’t going easily in they are most likely being installed incorrectly.• Solder the eight pins.• Install the 10 uF 25V electrolytic capacitor. Electrolytic capacitors have polarity. The shorter leg goes into the shaded area on the PCB. Bend the leads to hold it on place.• Solder the leads.• Clip the leads.• Install the power socket.• Solder the three pins. These pins are close. Make sure there aren’t any solder bridges.• Install the buzzer. The buzzer has polarity. Insert the longer lead into the hold marked with a + on the PCB.• Solder the leads.• Clip the leads.• Insert the 4-bit display. Make sure there isn’t any Styrofoam on the leads. The display has polarity. Make sure the decimal points are toward the other components. The pins might need slight adjustment to fit into the holes.• Solder the ten pins.• Clip the pins.• Insert the IC making sure that the notch in the chip are aligned with the notch on the socket. Check that the pins are aligned with the sockets before pressing the chip firmly in place.• Remove the white sticker from the buzzer for a louder sound – it’s really loud with it off.• Plug the power cord into USB power and then plug the barrel connector into the clock. The connection is firm and might not be fully in place. If the clock turns off when you take your hand off the power cords then it wasn’t fully inserted.Consider covering the back with tape – like blue painters’ tape – to prevent shorting out the clock. Remember too, there aren’t any memory components so when power is removed and then reapplied the clock will reset back to 12:59.All in all, this project can be completed in fifteen minutes or less!
T**R
Very Nice, Lots Of Fun
This digital clock is a kit so be prepared to assemble it yourself. I don't know how many solder joints there are but probably in the 100 joint range. Many of them are spaced 0.10" apart to. I mention this simply so that prospective buyers won't be surprised or disappointed. I considered this to be a "Feature" because I love building electronic projects and this one was easy to assemble and works perfectly.According to the documentation the clock has the following features:o Yellow-green mixed color display *o Automatic brightness adjustmento Time/Date/Alarm/Temperature (temperature in Celsius only!)o Adjustable alarm clock musico Time memory functiono Temperature value can be calibratedo Voice hourly reporto DIY manual solderingo Simple and easy to operate* I did not see a means in the settings to change the color but it is possible I just missed it.My only complaint, and the reason it got 4 stars instead of 5 stars, is the poor translation of the documentation from Chinese (I think) to English. With the number of Chinese products available in the USA today one would think that there is a company that provides accurate translation services but if there is not many are taking advantage of it. This one falls into that category. The assembly was easy since they provided a photograph of each step showing an enlargement of the component to be installed and where it is located on the circuit board. The documentation does clearly point out any components that are polarized and which end of the device is (+) and which is (-). These components ** MUST ** be installed in the proper orientation or the clock will not work.The problem with the documentation is in the settings of the clock. There are two pushbuttons that are pressed and held to get into the setup area however the only prompting is a title that reads "FU-1" through "FU-5" and you need the printed documentation to know where you need to go and how you need to manipulate the buttons to set the clock as you desire. That section of the documentation is not very clear and I made a lot of mistakes setting mine.Be aware that as far as I can tell the clock only displays the time in 24 hour mode, I didn't see a way to change it to 12 hour mode. I wanted 24 hour mode so it worked well for me though. Likewise the temperature is displayed only in Celsius and cannot be set to Fahrenheit. I did NOT want that so having the temperature on the clock is worthless to me.The clock has to be plugged in to work. It comes with a USB power cord and the end on the clock is a typical 2-pole where the center pin is (2) and the outer shell is (-). Unfortunately it is smaller than most so finding a power supply might be a problem. If you just want it to go along with your computer then a USB connection will work fine.The kit is an easy and fun afternoon assembly project. Getting the six pieces of the acrylic enclosure to stand up at the same time is difficult (Hint! A couple of rubber bands really helps at this stage). I enjoyed building it and I enjoy having it sit on top of my monitor. If you have kids it would be a fun project to spend an afternoon constructing it with them.
S**C
Good learning kit and bright, clear time display
This is a good project for someone learning about electronics that wants to use solder. There are some kits that are better for "1st project", but this one should be something a beginner can complete in about an hour or so.To help make the components lay down on the board while being soldered, you might want to put a folded washcloth down for your workspace and start with the shorter components and ending with the thickest components. This can help keep the components in place while soldering.I was very impressed with the brightness and clarity of the display component.Setting the clock is pretty easy, but by default there are 3 alarms set to go off within 5 minutes after you power it on. You will need to turn each off manually if you don't want daily reminders every 24 hours.I recommend this kit as a 2nd or 3rd project. It might be a bit challenging as a 1st project.
Trustpilot
4 days ago
2 months ago