


FLASHFORGEAdventurer 5M 3D Printer Enclosure kit, DIY Design, Reduce Noise, Increase Safety and Odor Isolation, Supports Printing High Temperature Filaments, Like ASA and PC
Details
- BrandFLASHFORGE
- MaterialABS
- Item Weight4.2 Pounds
- Compatible DevicesLaptop
- Compatible MaterialAcrylonitrile
Description
Print in peace! 🖨️
- SAFETY FIRST - Keep your environment safe by preventing access to hot components and reducing dust accumulation.
- ODOR FREE ZONE - Create a pleasant printing atmosphere by effectively isolating and containing odors from materials.
- QUIET OPERATION - Enjoy a serene printing experience with noise reduction, perfect for home or office settings.
- PERSONALIZED STYLE - Transform your workspace with a customizable exterior that reflects your unique taste.
- ENHANCED PRINT QUALITY - Maintain optimal heat dissipation for superior print quality with high-temperature materials.
The FLASHFORGE Adventurer 5M 3D Printer Enclosure Kit is a DIY solution designed to enhance your 3D printing experience. It features a customizable exterior, stable temperature control for high-temperature filaments, noise reduction capabilities, increased safety for children and pets, and effective odor isolation, making it ideal for both home and office environments.


Reviews
A**R
Love this DIY Kit customization.
Yes you still have to 3d print the rest of the enclosure but thats the fun in it and the cheaper price you pay for the 5m vs the Pro. Love that I was able to customize my own and have the option of enclosing it or having it open. On the decibel meter, its not a huge difference with numbers but the high pitch sound of the fan is noticeably quieter after it became enclosed. Sometimes i would have to go check on the printer because i thought it was done.Everything that was suppose to come with the Kit was there. No damaged/missing Parts. Very well packaged. Easy instructions. If your still confused. Theres a ton of youtube tutorials out there.
A**.
Make the ad5m look like a real printer
Printed the minimalist kit and all the parts worked well with it. The drag chain deal is kind of a pain along with the hot end wire routing but everything else works well
J**R
Flashforge AD5M upgrades
This was a definite upgrade for my Flashforge Adventurer 5M. Easy to install. It makes the AD5M just a bit quieter.
T**Y
Waste of money and time. Does not even fit together.
Horrible. You pay $45 for a few screws and pieces of plexiglass then have to spend 48 hours and 2kg of your own filament printing off your entire enclosure. None of the magnets fit in the holes (I had to drill out the holes because I already had everything printed when I was assembling) and none of the plexiglass windows slide in where they are supposed to. The instructions skip portions of steps and I had to go back multiple times and redo parts where it wasn’t fully explained (even with the instructions not being clear it is 26 steps and takes a full afternoon to assemble) now that it is together the plexiglass on top does not fit on the risers where it is supposed to, the plexiglass on the sides don’t fit, the door bows out and even if everything did fit it looks trashy because it makes you use your own superglue to glue magents into holes that once again are not the right size which leads to a mess. 0 stars. Save the time and money and buy a universal enclosure.
E**N
Pretty good
Firstly, to those saying they got frosted glass, acrylic sheets come with a film that has to be removed. Second the instructions could definitely be better. Third the print file is not great. My recommendation would be to go somewhere like printables.com and getting an updated enclosure print file. I wasted a ton of filament on parts the wouldn't fit and hinges the were fused and snapped rather than opening. The kit itself has what you need and comes with extra screws which is nice incase you drop one and can't seem to find where it ended up.
V**C
Not well finished
Once you 3d printed the parts, it's an hour or two of your time to assemble. I suggest having the video from flash forge up so you can follow along. I didn't and I had to take pieces on and off a few times. I also suggest printing the risers one at a time so it's in the correct orientation. I printed 2 at the same time and the tabs broke while assembling. Not a big deal, I just left it and it seemed ok. The other riser pieces were really solid since I printed them one at a time and in the correct orientation. I needed to drill out the hole for the feed tube because it would go in as is. The front plexiglass just barely closes because the hinges tolerance is really tight where the glass meets the frame. There fit and finish issues everywhere. Not that big of deal since its not supposed to be air tight. The instructions are ok. You can reuse screws on some spots but the instructions won't say that. Use the guide tube provided as it's shorter, too much slack will bunch on either end making it harder to feed. Have super glue ready for the magnets. The spool holder revealed an issue masked by where the stock spool holder. Since there's no weight back there dampening the back plate, it now rattles and vibrates a lot. I suggest taping it down or wedging something in-between the back plate to eliminate the vibration. The spool holder and filament sensor is probably the hardest part to assemble, you need to change the orientation of the sensor and sandwich the holder with the guide arm piece together. Its definitely more quiet, however, maybe it's my particular unit but there's a lot of vibration noise from the new parts, which is worse than the stock noise. So I'll have to spend more time "cleaning" everything up. It's not that expensive and does what it does but it takes some work.
L**K
Simple to setup and you print your own parts for wide color personalization.
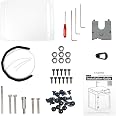
Very easy to install as all the tools and hardware is included. The fact that yopu need to print the parts except for the tubes and drag chain, the print quality of the parts and the color sel;ection that you have on your end is what will make your printer unique. You do need to provide your own glue to glue the magnets together but adhesion is great. It is worth buying if you find yourself having issues with thermal shock in your prints. For the functionality it provides much better quality prints for your printer as it keeps all the heat inside.
E**N
Kit works well
Works as advertised as long as your prints come out good you'll have no issues upgrading your ad5m
Common Questions
Trustpilot
1 day ago
2 weeks ago
